Want to check error logs on your WordPress website? This is the guide you need.
In our prior article, we helped you with how to enable error logs on WordPress with both manual and plugins method. But what next? How do you check these error logs? Do you need to install some other plugin to view them? Can you view them directly using your WordPress dashboard? I am sure you, too, might have several such questions, and to answer them all, here is a small guide.
Also read: How to Solve Critical Error on WordPress | My Website is Down Issue

Get 30% to 200% Faster Website Performance
- High-performance CDN
- Google’s cloud servers
- Reduce load times by almost 49% (TTFB, cache, and more)
- Site backups and uptime checks
- Free SSL certificates
How to Check Error Logs on WordPress Website?
To check error logs on the WordPress website, you will need access to the server on which you are hosting your website. In addition, you are required to enable the error log or debug log on your website. If you are unsure of how to do it, here is the guide on how to enable the error logs on a WordPress website.
Once you meet both requirements, here are the steps that you can follow to check error logs on your WordPress website.
- Login to the hosting server where you have set up your WordPress website; you can also use sFTP connections to do this.
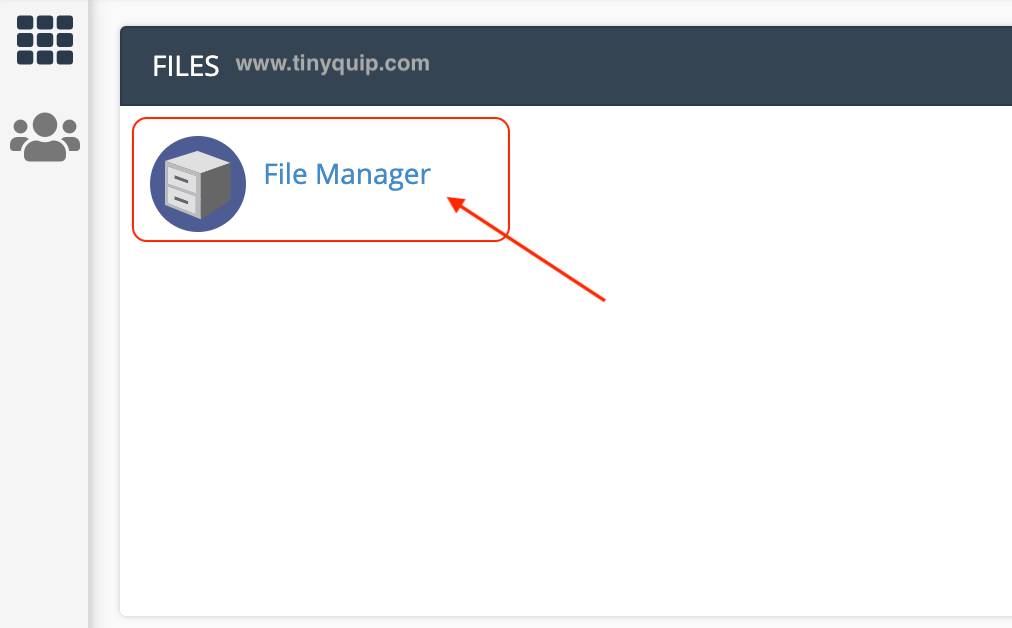
- Now, look for the “File Manager” option under the “Files” section. At times, you might find it under different names like “Files,” “Directories,” “Folders,” and likewise.
- Using the “File Manager,” navigate to the location where you can find all the files of your WordPress website. It is usually under the home directory > www/WordPress/website_name > website_name, and you can find all the core WordPress files.
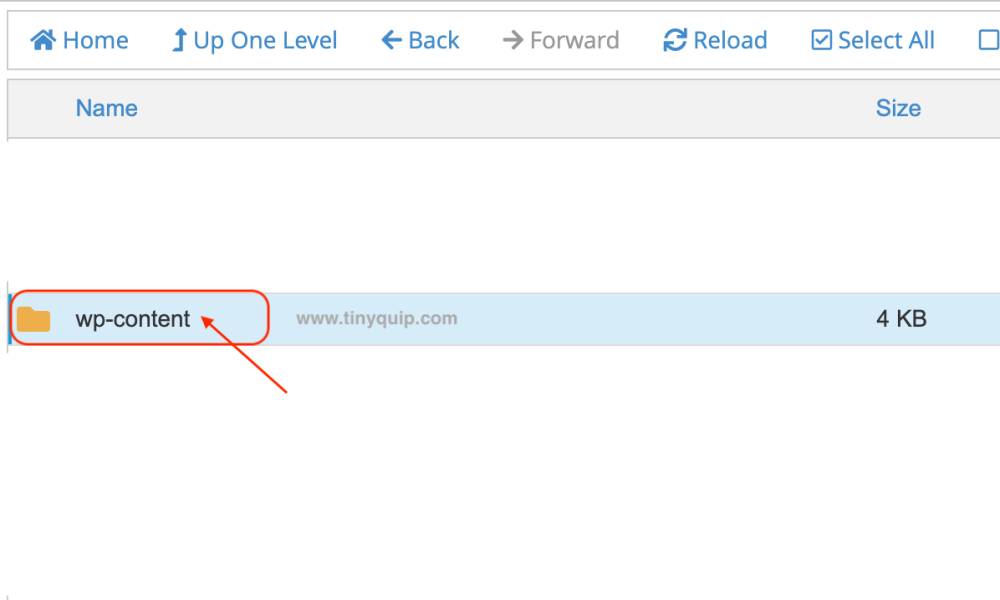
- Navigate to the “wp-content” folder, and here you can find the “debug.log” file; download it to check all the error logs on your WordPress website.
This method only works when you have enabled the error logs using the wp_config.php file. However, if you feel it is pretty risky or you are not from such a nerdy background to make script changes, you can also use plugins to check the error logs on your WordPress website. Besides, most plugins usually don’t require you to make manual script changes for them to work.
Check WordPress Error Logs using Plugins
Checking error logs using a debug code requires you to have access to the server. But if you are in a hurry and want to know which error is causing your website to crash, you can use error log plugins. Now, there are several popular error log plugins that can help you view all the errors; to list out a few, WP Debugging and Error log Monitor are two of the popular options, and there are other popular plugins too.
However, always know that bad or incompatible plugins can cause other issues with your WordPress website, such as 403 Forbidden Error. So, it is best to always install trustable and compatible plugins and always take an entire backup of your website more frequently so you can restore your website later.
Wondering how to install a WordPress plugin? Here are a few steps to follow,
- Login to your WordPress website, and you will see the WordPress dashboard.
- On the left of your WordPress dashboard, you can find the “Plugins” option; tap on it.
- On the right of your screen, you can find the list of all the plugins that are installed; tap on the “Add New” option from the top to add a new plugin.
- Using the search bar on the left, look for a decent error log plugin such as WP Debugging or Error Log Monitor.
- Check for issues, ratings, reviews, screenshots, and compatibility; if everything suits your need, tap on the “Install” button to install the plugin on your WordPress website.
- Now, tap on the “activate” option, and you can then find it on your dashboard or settings menu.
That’s it; now, navigate to these plugins, and you can find all the errors and issues that are causing inconvenience with your website.
Also read: How to Fix 403 Forbidden Error on WordPress | The Handy Guide
Frequently Asked Questions [FAQs]
Using the sFTP connection, log in to your hosting service and open the “File Manager” location where the website is installed. Under the folder “wp-content,” you can find the debug.log file, download it, and open it to check all the error logs on your website.
There are a few plugins like WP Debugging and Error Log Monitor that help you view all the errors that your website is facing without access to the hosting server.
To enable the error log on a WordPress website, navigate to the wp_config.php file and then add the statement “define ( ‘WP_DEBUG_LOG’, true );” to generate a debug file. You can later set it to false or disable display with the help of two more statements.
Before You Leave
Get Our Prime Content Delivered to your Inbox for Free!! Join the Ever-Growing Community… Right Now.
Give this article a quick share,
Wrapping up: How to Check Error Logs on WordPress Website
You can easily check the error logs on your WordPress website using the debug.log file. However, it requires you to set DEBUG to true in your wp_config.php file. The other method is to use a plugin that can show you the errors without having to access the server repeatedly. But the debug.log file method is a more reliable one for me, and plugins often cause other issues like poor speed performance or conflicting errors.

Get Powerful Managed WordPress Hosting
Check out Kinsta WordPress Managed Servers for powerful cloud server performance, high page speed, and managed deliverability.
- Cloud servers with your choice of data center among 35 locations
- HTTP/3 quick support
- Malware security pledge
- Staging environments, site management, and optimization tools
- Cloudflare Enterprise and CDN
I hope to have helped you with how to check error logs on your WordPress website using the debug log file; let me know in the comment section if this comes in handy for you. If you like this article, do give this a quick share on your social media handles, and do tag us. Also, join our Telegram channel, Facebook page, and Twitter to never miss a quick tech update.


