Apple being one of the smart device manufacture has simplified our lives with ease in almost every other thing in our day to day life. With the iPhone location sharing feature, you can do jobs like finding a hotel, sharing location with family, and also find your lost iPhone.
Several apps request locations on your iPhone for various purposes, but have you fully explored the built-in location features? In this guide, we explore the iPhone location sharing and configure them to our best fit.
On the other hand, have you checked our exclusive guide on how to save an iPhone battery? I saved almost 50% battery and $69 by using these tips (Case Study Included).
iPhone Location Sharing Guide
- Sharing Location on iMessages
- Location Sharing with Family – iCloud
- Emergency SOS Location Sharing on iPhone
- Setting up Location Services for Find my iPhone
- WhatsApp location sharing
Sharing location on iMessages helps you when you are waiting for someone and want them to know your exact location.
For example, you are waiting in a restaurant for someone who is new to the place. They might find it difficult to reach the restaurant since they are not familiar with the routes. In such a case, you can share your location with them and they can follow the route on the map.
To share location on iMessages, there are two option –
- Share live location for a certain amount of time only
- Share location indefinitely
Below are the steps to share location on iMessages for a certain amount of time or indefinitely –
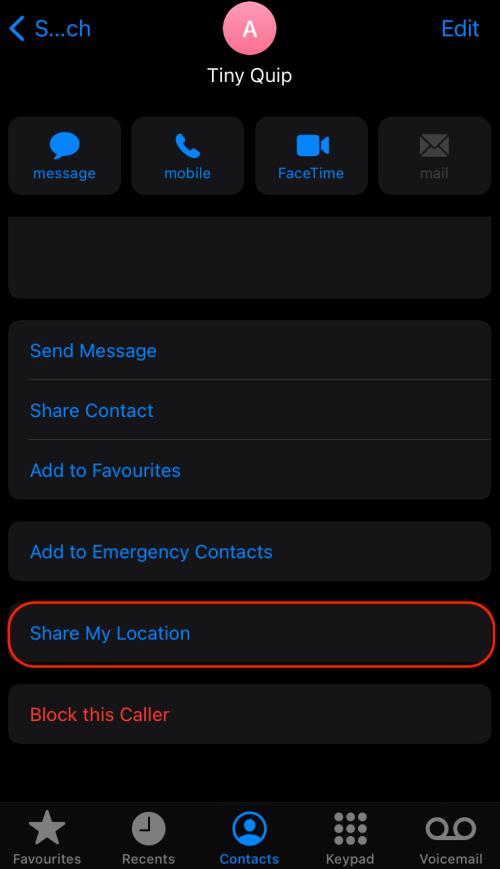
- Open the contacts of the person you want to send your location
- Scroll down and click on “Share My Location”
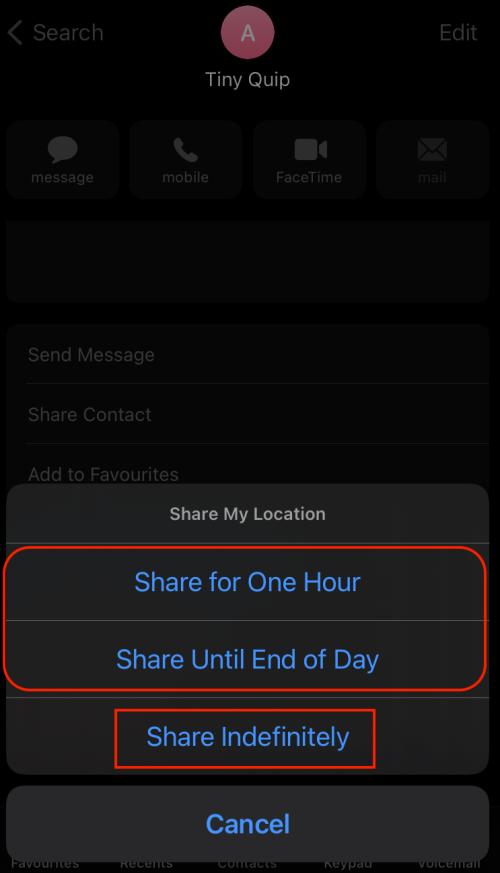
- Select One Hour, One Day to share for a limited time only.
- If you want to share location indefinitely, click on “Share indefinitely”
As soon as you click on share location for one hour or one day, the chat with the other person along with a map is displayed. Using this map, the other person can navigate to you and after the specified time, your location is no longer displayed, it expires.
Moreover, when you share the location indefinitely, the location never expires. Additionally, the other person can access this location for an indefinite amount of time.
If the meeting is temporary and the person is not close enough, it is better to share the location for temporary or limited time only.
Also read: 21 Best MacBook Pro Accessories in 2021
Location Sharing with Family – iCloud
My family is less crazy about iPhones but if your family members have an iPhone, you can share your location with them. Also, the family setup on iCloud allows your to share other subscriptions like Apple TV and iTunes. Additionally, they don’t need to pay the price again as they are sharing the subscriptions with you.
So, how to setup location sharing with Family on iCloud? It is simple, follow the steps below –
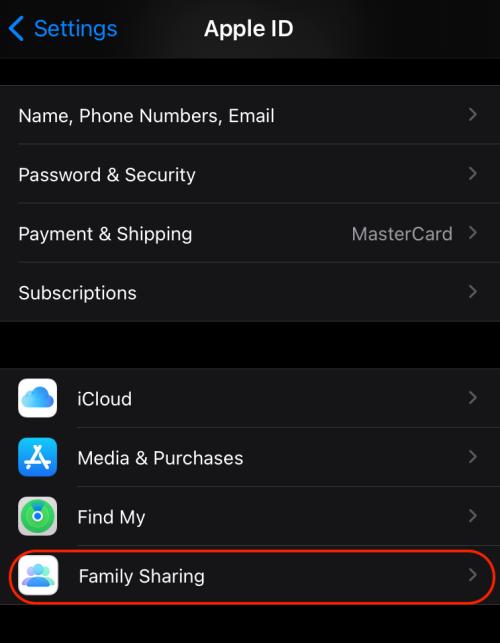
- Open the settings menu on your iPhone.
- Click on your Apple ID and scroll down to find “Family Sharing”
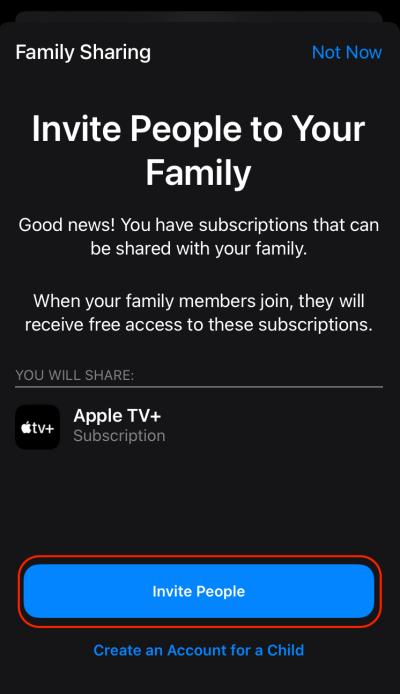
- If you haven’t set up the “Family Sharing”, you are prompted with a simple setup. At the end of the setup, you are given an option to invite people. Remember, you can add only 6 members on “Family Sharing”
- Great that you are done with the setup. Now, your family members can access your location and it is a great option for parental controls.
Family Sharing is one of the best options if you have bought some subscriptions; you save some money by using this feature. Additionally, family members can access your location in an emergency.
Emergency. That said, the next section is about setting up location sharing for emergencies.
Emergency SOS Location Sharing
Emergency SOS is my favourite feature on iPhone; if you are traveling or living in places that are unsafe, this feature comes in handy. Emergency SOS can be activated by clicking the power three button times or clicking it for five times based on the configurations you have made.
Once, the emergency SOS is activated; certain actions are called up such as dialling emergency numbers, sharing location and send details to all the emergency numbers.
How to add emergency numbers?
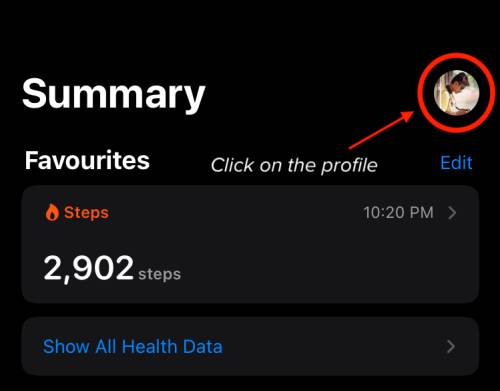
- Open the “health” app on your iPhone.
- Click on profile in the health app.
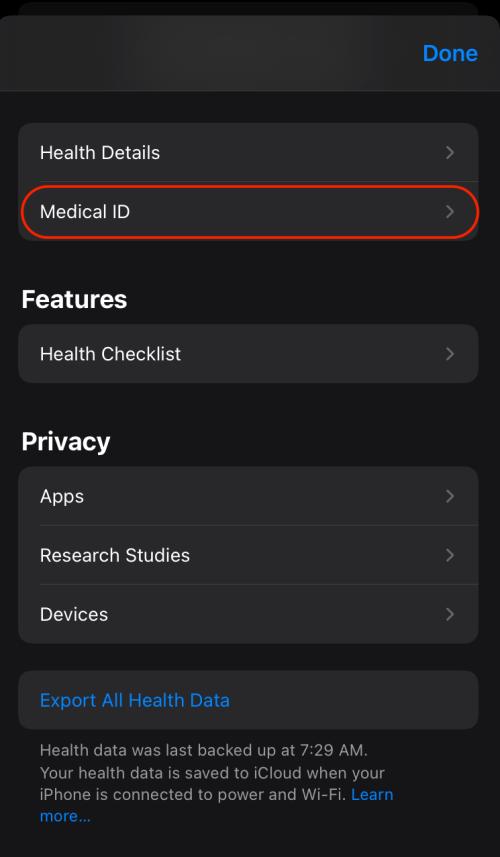
- Click on the Medical ID to change the details.
- Scroll down to find “Emergency Contacts”
- Enter one or more numbers in the list and click on save.
- Now, go to Settings > Emergency SOS
- Configure three times or five times to awake the Emergency SOS
To activate the Emergency SOS, click 3 times or 5 times the power button repeatedly and the emergency number 911 is dialed. Along with this, the numbers in Emergency contacts will receive a message about your location and notify they are listed as emergency contacts.
Setting up Location Services for Find my iPhone
Find my iPhone is still one of the best ways to find your lost iPhone device and your family’s ios devices.
What is Find my iPhone?
If you have misplaced your device, you can use the “Find my device” feature to track your iPhone. This requires you to enable iCloud and location services on your iPhone beforehand.
Find my device displays the last location of your device when it was accessible by the iCloud services. If the device is stolen and turned off or the network services are disabled, Find my iPhone displays the last location of your device.
How to set up Find my iPhone location services on iPhone?
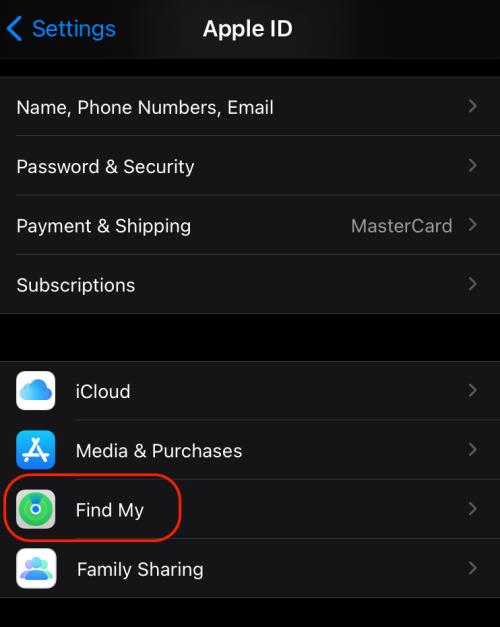
- In the settings menu on your iPhone device, open your apple ID.
- Scroll down and click on “Find My”.
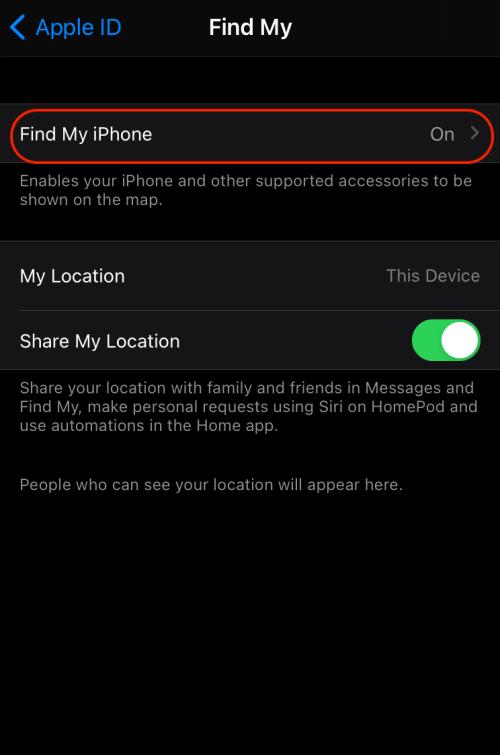
- Now, enable “Find my iPhone” and “Share my location”.
If you have lost your device and now want to access the last location, follow the below steps –
- Open iCloud on any other device with internet access and browser support (Android, MacBook, Windows, or any other device).
- Sign-in using your Apple ID and password.
- Now, you can find any of your Apple device listed on iCloud
- Additionally, you can ring your device, turn the lost mode, or erase the whole device.
WhatsApp is one of the most used chatting apps on the App store and no doubt it has a great set of features. Recently, users have shifted from WhatsApp to WhatsApp business, and with growing opportunities; people have to share their location with their clients and other partners.
Using the location services, you can share your location with a single-tap for temporary or for long time. Additionally, you can share the live location for temporary time or for all day long.
That said, here is how to share location on WhatsApp – iPhone,
- Open WhatsApp chat on your iPhone.
- Select the chat you want to share the location with.
- Tap on the “Pin” icon and select location sharing.
- Now, you can choose if you want to share a live location and for how much time.
Final Words
This was our guide on iPhone location sharing; if this guide was helpful, share it on your social media and tag us.
Want to boost your Wifi speed or use Wifi in wifi dead zones? You must check out our picks on “Best WiFi Range Extender and Internet Signal Boosters.“
You may also like,






Amazing information.
I never knew I could share Apple subscriptions with family by sharing my iPhone or iPad location.